Hiring a Studio for an E-commerce or Apparel Shoot in Sydney
October 9, 2026
If you have ever tried to photograph a full product range on your living room floor, you already know where this is going. The light shifts, the white wall turns beige by lunchtime, and by shot forty nothing matches shot one. At Desk and Studio, we see this a lot: a brand turns up for their first studio day having learned the hard way that e-commerce photography is less about one beautiful image and far more about a hundred images that look like they belong together.
An e-commerce or apparel shoot is its own kind of shoot. It is not an editorial, and it is not a single hero product on a plinth. It is volume work, and volume work rewards planning. Here is how to set yours up so you walk out with a finished catalogue rather than a folder of near misses.
Why e-commerce shoots belong in a hired studio
The thing that makes product and apparel photography sell is consistency. A customer scrolling a collection page should see twenty items that sit at the same scale, on the same background, under the same light. The moment one shot is warmer or one shadow falls the other way, the grid looks amateur, and the brand pays for it.
A controlled room is what buys you that consistency. With the blinds down and strobes doing the work, your light at 4pm is identical to your light at 10am. Nothing drifts. You set your exposure once, mark your camera position, and the rest of the day is repetition rather than problem solving.
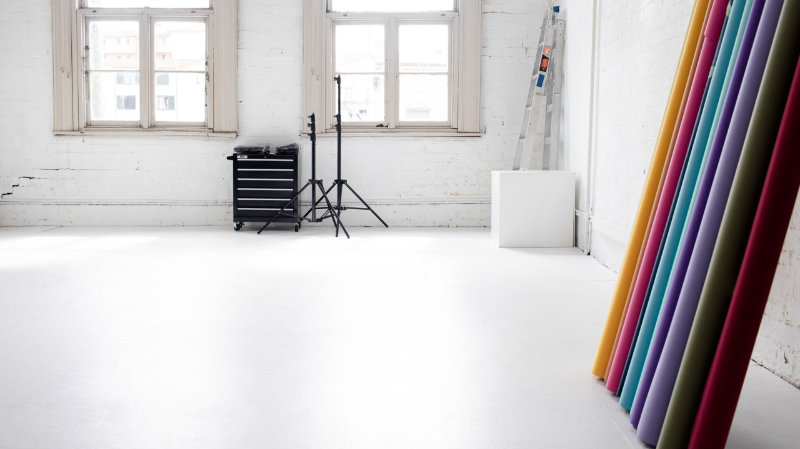
The second reason is throughput. Our shooting floor is 5.7 metres wide by 9 metres deep with 4.6 metre ceilings, which means you can leave a full on-white setup standing at one end and a styled lifestyle corner at the other, then move between them without rebuilding anything. On a catalogue day, not rebuilding is the whole game.
Work out your shot count before you book
This is the single most useful hour you will spend, and most people skip it. Before you choose between a half day and a full day, write the actual list.
Count your products. Then multiply by the number of angles each one needs. A simple homewares item might be three: front, detail, in use. A garment on a model might be five: front, back, three-quarter, a close crop on the fabric, and one movement frame. Twenty garments at five angles is a hundred frames, and a hundred frames is a full day, not a half.
As a rough planning figure, a well-prepared team on a standing setup can move through roughly fifteen to twenty-five product shots an hour for still items, and considerably fewer for on-model apparel once you factor in changing and steaming. Treat those as starting numbers to test against your own first shoot rather than a promise.
If the maths says you are over, the answer is almost never to shoot faster. It is to book the longer block or split across two sessions. Rushing a catalogue produces exactly the inconsistency you hired the studio to avoid.
Set up for consistency, not for one hero image
Once you are in the room, resist the urge to chase a beautiful one-off. Your job on an e-commerce day is to build a repeatable system and then feed products through it.
- Lock your camera down. Put it on a tripod and mark the legs on the floor with tape. Same height, same distance, same focal length all day. If the camera does not move, your products land at the same scale with no resizing later.
- Shoot tethered if you can. Judging a product image on the back of a camera is guesswork. On a laptop you can see whether the label is readable and whether the white is actually white, while the item is still in front of you.
- Set a manual white balance and leave it. Pop a grey card into your first frame of the day, set it, and do not touch it again. Your whole batch will then edit with one preset instead of forty.
- Mark the product position too. A small taped cross or a sheet of paper under the subject keeps every item landing in the same spot in frame, which is what makes a collection page look tidy.
- Name your files as you go. Shoot each product in a clear sequence and keep a written shot list you tick off. Matching three hundred images to SKUs after the fact is a miserable evening.
- Take a reference frame between products. A quick shot of a card with the product name on it gives you an unmistakable divider when you are culling later.
Choosing your background
Most e-commerce ranges need two looks, and it is worth deciding which before you arrive.
On-white is the workhorse. It is what marketplaces usually require, it isolates the product, and it drops cleanly into any page design. Our paper rolls come in white, black, grey and beige, so a clean white sweep is always available, and a soft grey is often the better choice for pale or white products that would otherwise disappear.
Lifestyle or textured is what sells the brand rather than the item. Timber floors, white brick and daylight from the two arch windows give you a warm, real-room feel without having to build a set. A lot of brands shoot their full range on white in the morning and then spend the last hour or two gathering a handful of lifestyle frames for the homepage and social.
If you are new to working with studio lighting and modifiers, our guide to choosing studio lighting to rent is a good place to start, and our piece on product photography in a hired studio goes deeper on lighting a single item well.
What the green room does for an apparel shoot
For clothing, the preparation space matters as much as the shooting floor. A crease that takes ten seconds to steam out takes ten minutes to retouch, and multiplied across a range that is the difference between finishing on time and not.
Our green room has clothing racks, makeup desks with mirrors and a steamer, so a stylist can prep the next three looks while you are still shooting the current one. That overlap is what keeps an apparel day moving. The practical version: hang everything in shooting order the moment you arrive, steam in batches of three or four, and never let the camera wait on a garment.
If your shoot leans more creative than catalogue, our post on hiring a studio for a fashion or editorial shoot covers that side of things.
Frequently Asked Questions
How long should I book for an e-commerce shoot?
Work from your shot list rather than a feeling. For still products, a half day suits roughly forty to sixty finished shots. For on-model apparel, a full day is usually the realistic minimum once you allow for changing, steaming and breaks. Our cost guide sets out the current rates.
Is lighting included, or do I bring my own?
Studio hire at Desk and Studio includes the lighting and backdrops, so you are not hiring kit separately. That covers Godox strobes, a range of softboxes, beauty dishes, strip boxes and continuous LED panels, plus C-stands, booms and sandbags. You are very welcome to bring your own bodies, lenses and favourite modifiers as well.
Can I set up a tethering station?
Yes. There is room alongside the shooting floor for a laptop and table, and a kitchenette for the coffee that an e-commerce day runs on.
Do I need a stylist and a model, or can I shoot flat-lays?
Both work. Flat-lay and ghost mannequin work is faster and cheaper and suits many ranges perfectly well. On-model shots convert better for apparel, but they cost more time, so decide which items genuinely need a person in them.
What if my range is bigger than one day?
Split it. Shoot the best sellers and new season first while energy is high, then book a second session for the long tail. Because your lighting and camera marks are recorded, the second day will match the first.
Ready to shoot your range?
A catalogue shoot is not glamorous work, but it is some of the most valuable photography a brand ever commissions, and getting it right once sets up everything that follows. If you would like a room where the light does not move and the gear is already waiting, we would love to have you in.
Come and see the space, talk through your shot list with us, and we will help you work out whether you need a half day or a full one. You can take a look at the photo studio or get in touch to book your shoot day.
More Articles
- Hiring a Studio for an E-commerce or Apparel Shoot in Sydney
- Hiring a Studio for a Group or Team Photo in Sydney
- Photo Studio Hire by Area: Comparing Sydney Inner West, CBD and Alexandria
- Content Studio Hire in Sydney: Shoot a Month of Social Content in One Session
- Your Studio Shoot Day Run Sheet: How to Plan a Half Day or Full Day Hire in Sydney
- Natural Light Studio Hire in Sydney: How to Make the Most of a Daylight Studio
- How Much Does a Hot Desk Cost in Sydney? Day, Week and Month Rates
- Hiring a Studio for Dance, Movement and Performer Portraits in Sydney
- Photography Space for Rent in Sydney: What You Actually Get
- Hiring a Studio for a Beauty, Hair or Makeup Portfolio Shoot in Sydney
- Hiring a Studio for Family and Kids Photography in Sydney
- Hiring a Studio for a Fashion or Editorial Shoot in Sydney
- What to Expect Inside a Sydney Photography Studio
- Hiring a Studio for Headshots: How to Run a Smooth Headshot Day in Sydney
- How to Hire a Photography Studio for a Day in Sydney
- Affordable Photography Studio Hire in Sydney: How to Shoot on a Budget
- Renting Your Own Photography Studio vs Hiring by the Hour in Sydney
- How to Hire a Studio to Run Your Own Photography Workshop or Class in Sydney
- Product Photography in a Hired Studio: How to Plan, Light and Shoot Like a Pro
- Choosing Studio Lighting to Rent: A Photographer's Guide to Lights, Modifiers and Backdrops
- Your First Studio Photography Shoot: A Beginner's Guide
- Photography Studio Rental in Sydney
- Photography Workshops in Sydney and How to Choose One
- How to Find a Photo Studio Near You in Sydney
- Photo Studio Hire in Sydney's Inner West
- How to Choose the Right Photoshoot Space in Sydney
- Self-Shoot Studios: How to Take Your Own Photos in a Hired Space
- How to Hire a Studio for a Boudoir or Portrait Shoot
- How to Hire a Photography Studio in Sydney: The Complete Guide
- How Much Does It Cost to Hire a Photography Studio in Sydney?
- Hot Desk & Creative Coworking in Sydney's Inner West
- Hiring a Video Studio in Sydney: Green Screen, Lighting and Sound
- Dry Hire Explained: Renting Studio Lighting & Backdrops in Sydney
- Planning a Content or Personal Branding Shoot in a Sydney Studio
- Click, Learn, Repeat: A Photographer’s Growth Guide
- The Power of Versatility: Mastering Natural and Studio Light in Photography